In today’s manufacturing landscape, achieving zero-defect production is paramount across numerous industries, from automotive and aerospace to construction and manufacturing.
For metallic surfaces, even minor imperfections can significantly impact structural integrity, product performance, functionality, and aesthetics. In industries such as the automotive and aerospace, surface defect detection is particularly critical, since any deviation from deemed acceptable standards can cause major safety hazards. To ensure product quality and safety, robust inspection methods are employed to identify these anomalies.
This article explores various techniques used to identify these anomalies, ensuring the highest standards of quality and safety of metallic components.
Key Takeaways
- Flawless surfaces: Ensuring flawless metallic components is crucial in various industries for maintaining structural integrity, functionality, and aesthetics.
- Defect detection techniques: Multiple techniques are used to detect defects on metallic surfaces, including traditional visual inspection, light enhancement techniques, and non-destructive testing (NDT) methods like ultrasonic testing, radiographic testing, and eddy current testing.
- Better and faster inspections with AOI: Automated Optical Inspection (AOI) systems leverage high-resolution cameras, sophisticated lighting, and software algorithms to achieve faster, more objective, and accurate surface inspection compared to traditional methods.
- The role of Artificial Inteligence (AI): Machine Vision and AI are playing an increasingly important role in defect detection. AI allows for continuous improvement in defect identification, reduction of false alarms, and prediction of potential defects for preventative maintenance.
- The future of metal inspection: New technologies like AI and Machine Learning (ML) will make inspecting metal surfaces even more precise and reliable. Integration with other technologies like 3D scanning and laser profilometry is also expected to improve the comprehensiveness of surface inspections.
- Controlar’s PRiiMe: To improve efficiency and accucary of the quality control process by accurately identifying surface defects in piston rings, Controlar developed PRiiMe, an automatic inspection vision system capable of successfully manipulating different sized rings.
The Power of Inspection – Techniques for Detecting Defects on Metallic Surfaces
Maintaining the integrity of metal parts is crucial across numerous industries, estimated to be a $5.9 billion global market by 2028. Robust inspection methods are employed to identify surface and subsurface defects. Here’s a breakdown of the different approaches:
- Traditional Visual Inspection

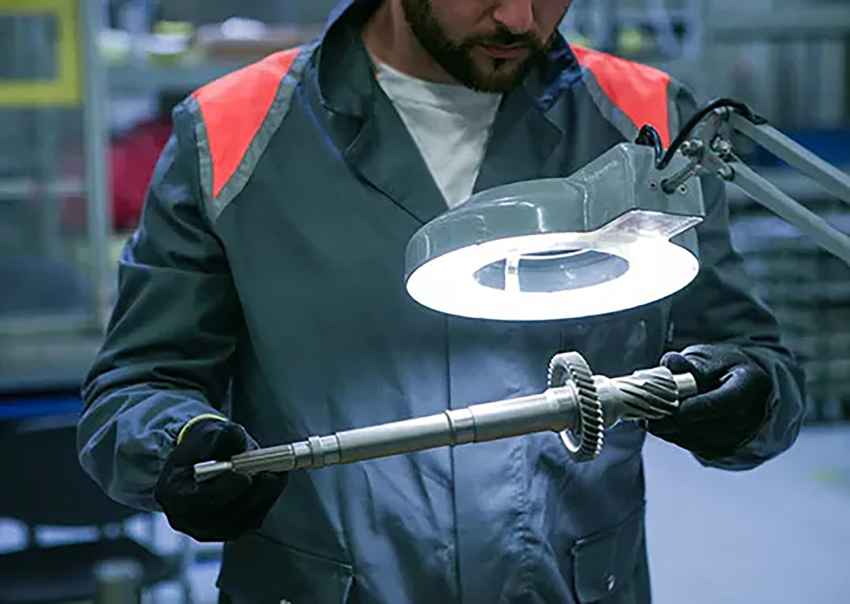
The human eye remains a fundamental tool. Trained inspectors meticulously examine surfaces under proper lighting, searching for inconsistencies like scratches, cracks, dents, discoloration, or texture imperfections.
While it offers advantages in speed and cost-effectiveness, visual inspection’s accuracy can be subjective and limited by human fatigue and resolution. Additionally, training new inspectors to achieve the performance of experienced personnel can take several months.
2. Light Up the Defects

Several techniques enhance visual inspection by manipulating light to highlight surface irregularities:
- Angle Lighting: Illuminating the surface at an oblique angle accentuates shadows, making defects like cracks and dents more visible.
- Diffuse Lighting: This method uses a broad, even light source to minimize shadows and provide a clear overall view of the surface for detecting larger defects or color variations.
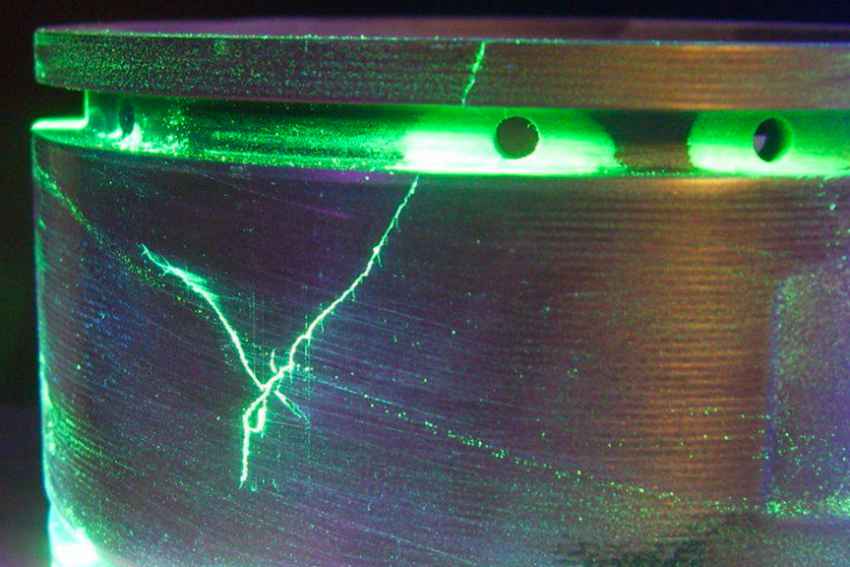
- Fluorescent Penetrant Inspection (FPI): A fluorescent liquid applied to the surface seeps into cracks and crevices. When exposed to ultraviolet light, the fluorescent material glows, revealing the location and size of defects.
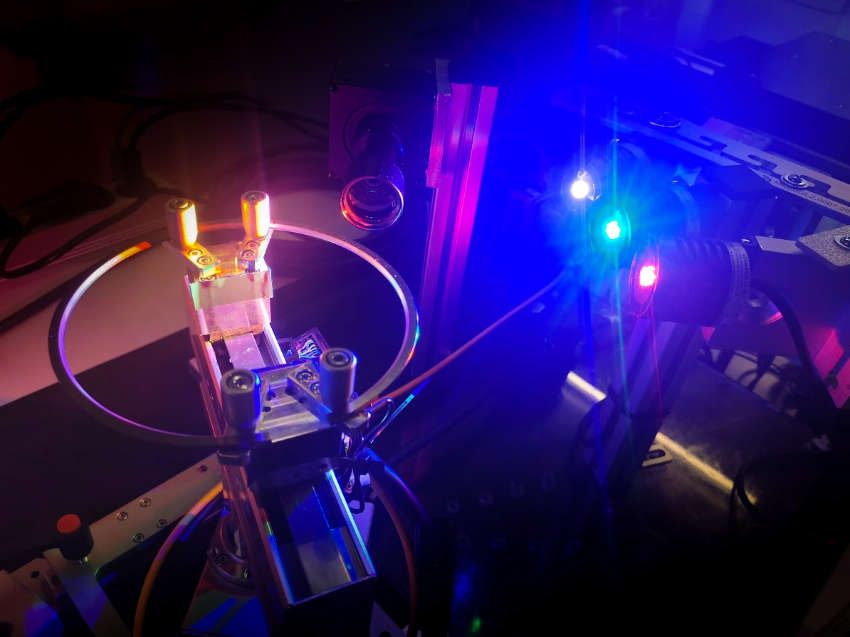
- RGB lighting: The use of three color lighting (red, green and blue) improves the flexibility of the system. Lights with different colors enhance pieces with different characteristics (from different colors or surfaces). Also, these 3 lights can be combined to get new colors, making the system more flexible.
Light-up techniques offer a cost-effective way to improve visual inspections, but they have limitations. These techniques may not detect all defect types and can be prone to subjective interpretation by inspectors.
3. Beyond the Surface: Non-Destructive Testing (NDT)

For a more comprehensive analysis, NDT techniques delve deeper to detect subsurface defects:
- Ultrasonic Testing (UT): High-frequency sound waves are transmitted through the metal. Defects like cracks, voids, and inclusions disrupt the sound wave pattern, allowing for their detection and characterization.
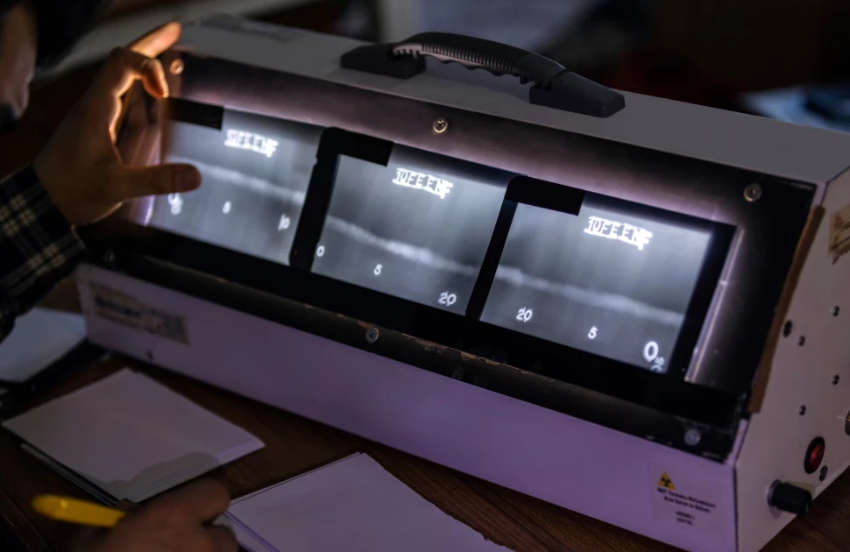
- Radiographic Testing (RT): X-rays or gamma rays are used to create an image of the internal structure of the metal. Defects appear as areas with different densities compared to the surrounding material.
- Eddy Current Testing (ECT): A magnetized probe generates eddy currents within the metal. The presence of defects alters the eddy current flow, which can be detected by the probe, indicating the location and type of defect.
Non-destructive testing (NDT) techniques are invaluable for revealing hidden defects, offering crucial insights for specific applications. However, NDT can be resource-intensive, requiring specialized equipment, trained personnel, and significant time investment. Additionally, some NDT methods may not be suitable for all material types or defect varieties.
The Rise of Automation and Advanced Techniques
The integration of automation and advanced technologies is revolutionizing metal surface inspection. While traditional techniques like visual inspection and NDT remain valuable tools, Automated Optical Inspection (AOI) offers a significant advantage by combining speed, precision, and data analysis capabilities allowing for:
- Early Defect Detection: Catching defects early in the manufacturing process minimizes wasted materials and rework costs.
- Improved Quality Control: Ensuring consistent product quality and reducing the risk of defective products reaching customers.
- Enhanced Process Optimization: Gathering and analyzing data from AOI systems helps identify areas for improvement in the manufacturing process to minimize defect occurrence.
4. Automated Optical inspection (AOI)
AOI systems utilize high-resolution cameras and sophisticated lighting techniques to capture detailed images of metal surfaces. These images are then analyzed by software algorithms trained to identify specific defects, offering several advantages over traditional methods:

- Objectivity: AOI systems provide objective, reliable results, reducing human subjectivity and inconsistencies.
- Speed: AOI systems can inspect surfaces significantly faster than human inspectors, improving production throughput.
- Accuracy: AOI systems can detect smaller and more subtle defects than the human eye can perceive.
- Data Collection: AOI systems generate detailed data on defect types and locations, enabling continuous process improvement and preventive maintenance strategies.
- Reduced Labor Costs: These automated systems reduce reliance on manual labor for inspection tasks.
5. Machine Vision and Artificial Intelligence (AI)
Machine vision systems, equipped with high-resolution cameras and powerful image processing algorithms, can analyze large areas quickly and consistently, identifying defects with high accuracy. Additionally, AI is being employed to train algorithms on vast datasets of defect images, enabling them to recognize even subtle anomalies that might escape human inspectors. Benefits include:
- Learning and Adaptation: ML algorithms can continuously improve their ability to identify new and complex defects.
- Reduced False Positives: AI can filter out irrelevant variations in surface texture, minimizing false alarms.
- Predictive Defects: By analyzing historical data, AI can predict potential defect occurrence, allowing for preventative maintenance and process adjustments.
PRiiMe: Controlar’s Automatic Inspection Vision System for Defect Detection on Piston Rings
Controlar, together with MAHLE and CCG, developed PRiiMe (Piston Rings intelligent inspection Machine), a machine designed to automatically detect defects on piston rings, in order to fully automatize the inspection process of piston rings, a crucial part of a vehicle’s engine.
PRiiMe has the capability to deal with piston rings with different dimensions, and to detect their defects in real-time, in order to improve production efficiency, and increase the quality of the end product.
The system’s core components include a machine with a rotary table that maneuvers the ring for inspection, a vision system with high-resolution cameras for image capture, and software for defect analysis and data management. This software not only identifies defects but also facilitates data visualization and analysis, allowing manufacturers to identify trends and improve production processes.
PRiiMe Key Points:
- Improved quality control: The system automates the inspection process, making it more consistent and reliable than human inspection. This can help to reduce the number of defective piston rings that make it into engines. Considering the criticality of pistons for the functioning of combustion engines, this translates to enhanced safety for vehicles on the road.
- Reduced costs: Automating inspection can save manufacturers time and money by eliminating the need for human inspectors.
- Faster inspection times: With a cycle time of ≈5-6 seconds, the system can inspect rings much faster than human inspectors, which can help to improve production efficiency.
- Data analysis for improved production: The system collects data on the defects it finds, which can be used to identify trends and improve the manufacturing process.
The Future of Metal Surface inspection
The future of metal surface inspection looks bright. Advancements in AI and ML will further enhance defect detection accuracy and speed. Additionally, integration with other technologies like 3D scanning and laser profilometry will enable even more comprehensive surface inspections. Here are some key trends on the horizon:
- Self-Learning Systems: AOI systems will become more autonomous, continuously learning from real-time inspection data to improve defect classification.
- Real-Time Defect Correction: Integration with robotic systems could allow for real-time defect correction during the manufacturing process.
- Predictive Maintenance: AOI data will be used to predict equipment wear and tear, enabling proactive maintenance to minimize downtime.
By embracing a multi-pronged approach that combines traditional methods, NDT techniques, and advanced automated systems with AI and ML, manufacturers can achieve superior quality control for metallic surfaces, ultimately leading to a more efficient and cost-effective production process.
Conclusion
Controlar understands the critical role flawless metallic components play across various industries. Even minor imperfections can significantly impact a component’s structural integrity, functionality, and aesthetics. This is why advanced defect detection methods are crucial for ensuring the highest quality and safety standards.
This article explored the limitations of traditional techniques and highlighted the value of innovative approaches like automation. Controlar’s R&D project on automated visual inspection of piston rings perfectly exemplifies this. This system offers faster, more precise, and consistent inspections, paving the way for the future of metallic surface testing.
Advancements like machine learning integration hold immense potential to further enhance these capabilities. By continuously refining these technologies, Controlar remains at the forefront of ensuring the highest quality and safety standards for metallic components across various industries.

